
Encharge IO: From Visitor to Subscriber
Picture a quiet path that moves a stranger to trusted subscriber without stress. You drop in a trigger, add one friendly email, and let Encharge do the work. The delivery link sits right at the top so no one misses it. You watch the numbers and make one tiny change each week. Grow your list like never before!
Friend to friend: a few links are affiliate links. When you purchase, I might get a tiny thank-you from the company, with zero added cost to you. I only recommend things that I’ve actually tried and looked into. Nothing here is financial advice; it is for entertainment. Read the full affiliate disclosure and privacy policy.
Build a working lead magnet funnel in Encharge in a weekend. Capture the email, deliver the asset instantly, and see real clicks in GA4. Then run one careful resend to reach people who missed it.
Encharge makes this build visual with a drag-and-drop Flow Builder where you connect Triggers, Actions, and Filters, then activate with a click.
Your audience isn’t a static “list” here—their membership shifts automatically based on behavior, which is why Segments are the heart of this setup.
You’ll tag your delivery link with UTM parameters and confirm performance in GA4 → Reports → Acquisition so results are clear and comparable over time. – Analytics Mania
To set expectations, we’ll reference current email benchmarks for opens and clicks, then use your own numbers as the truth you optimize against.
Follow the steps, keep copy benefit-first, and ship in one sitting… then circle back for a careful resend to non-openers and a weekly tune-up.

Disclaimer: Benchmarks are directional and vary by industry and list quality.
The Funnel: What You’re Building and Why
See the whole path at a glance: capture → deliver → welcome → measure.
You’re building a simple path that moves a stranger to subscriber and then to engaged reader. In Encharge, that path lives inside a Flow you can see and adjust visually, which helps you think in steps instead of guesswork.
Each step has a job, and together they deliver your lead magnet, welcome message, and early trust.
A quick map helps: capture → deliver → welcome → nurture → measure. In Encharge, you do this by arranging Steps on the Flow canvas.
Steps come in three types—Triggers to start the journey, Actions to send or update things, and Filters to branch logic—so you can model exactly what should happen for each new signup.
The Flow Builder UI shows a step selector, the canvas, and clear Activate Flow controls when you’re ready to go live.
Encharge objects in one minute (Flows, Steps, Segments)
- Flow: the visual journey a person takes once they qualify. It can be as simple as “person enters segment → send delivery email,” or as rich as a multi-branch sequence.
- Steps: Triggers start the flow, Actions send or update, Filters split paths. You connect them on the canvas to define the behavior.
- Segments: dynamic groups defined by conditions. People enter and leave automatically as their data or actions change, which is why triggers like Entered Segment are so useful for lead magnets.
quick_win: Sketch your funnel on paper first using the five-part map, then mirror it in the Flow Builder. You’ll build faster and make fewer edits.
Metrics you’ll watch first (open, click, CTR, CTOR)
You’ll track opens and clicks in your email tool, but two ratios give better direction: CTR (clicks ÷ delivered) and CTOR (clicks ÷ opens).
CTR shows overall reach and subject-line pull. CTOR isolates in-email relevance after someone opens. Use both to decide whether to fix subject lines or body copy. – Klaviyo
To frame expectations, review current benchmarks and then let your own data lead. Klaviyo’s 2025 report publishes fresh open and click rates by industry and flow type, which you can use as directional context as you test.
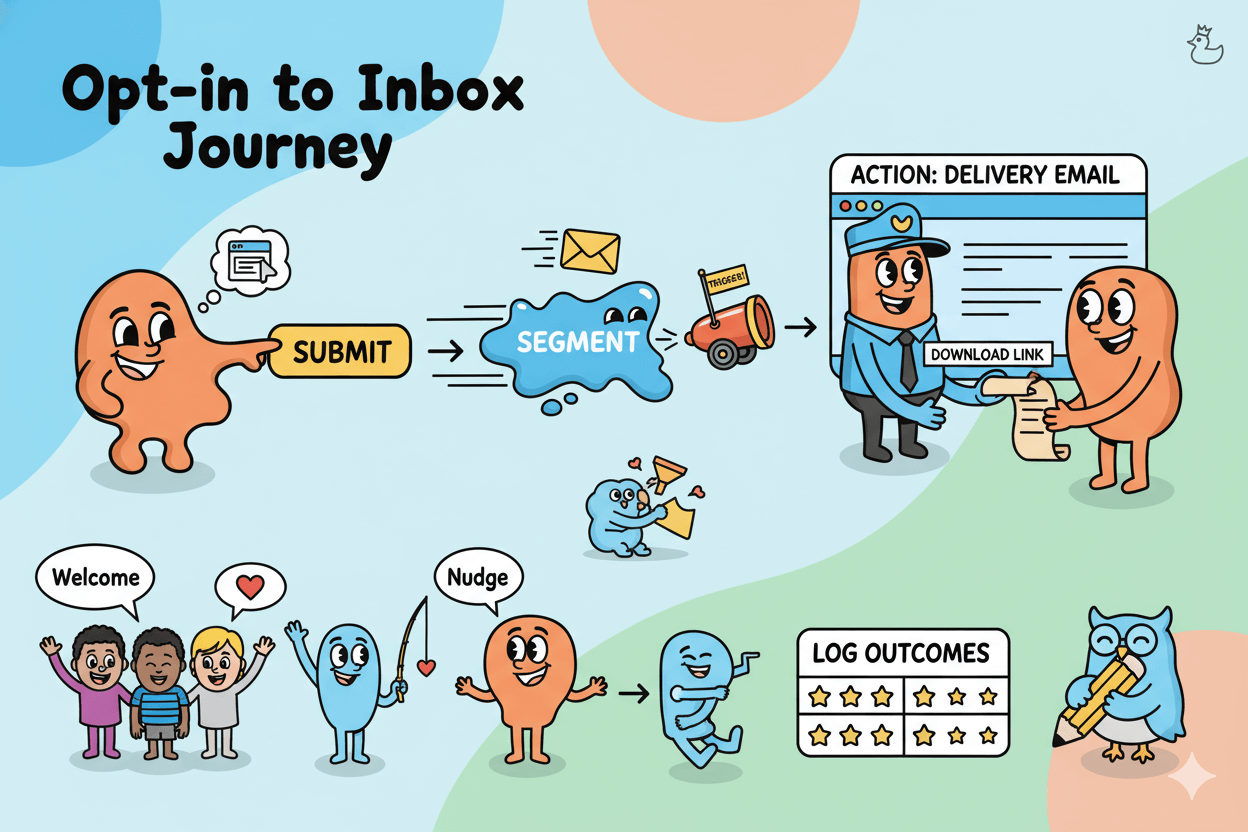
The “from opt-in to inbox” journey
A visitor submits your form or popup and meets your Segment conditions. That Segment change fires the Flow’s Trigger. The first Action sends the delivery email with your download link.
Subsequent steps welcome, nudge the next action, and log outcomes so you can compare against benchmarks and improve. It’s simple, visible, and easy to iterate.
Build Your First Flow: From Blank Canvas to “Activated”
Your first Encharge lead magnet funnel is three moves: create, connect, activate.
You’ll create a clean path a new subscriber runs the moment they qualify. Open Flows, click Add, and choose Start blank to begin on a clear canvas.
You can also pick a template, but a blank start keeps things simple for a lead magnet build. New flows created inside a folder inherit that folder automatically, which helps with organization.
The Flow Builder shows four key areas you’ll use: Step selector, Canvas, Canvas navigation, and Activate Flow / Flow settings.
You build by dragging Steps onto the Canvas and connecting them. Encharge recognizes three Step types: Triggers to start the flow, Actions to do something like send an email, and Filters to branch logic.
Keep this mental model close as you wire the journey.
Create → name → save draft (UI tour)
From the Flows page, select Add → Start blank, give the flow a clear name like “Lead Magnet Delivery,” and save as draft.
The blank canvas is where you’ll place the first Trigger. Because this funnel runs when someone qualifies for your lead magnet segment, you’ll add Trigger: Entered Segment.
This keeps the flow tightly scoped to new opt-ins entering that segment.
before_after:
Before: A one-size-fits-all welcome email sent to everyone.
After: Only people who enter your lead magnet Segment start this flow, so delivery stays accurate and immediate.
Add Trigger and Action email (basic path)
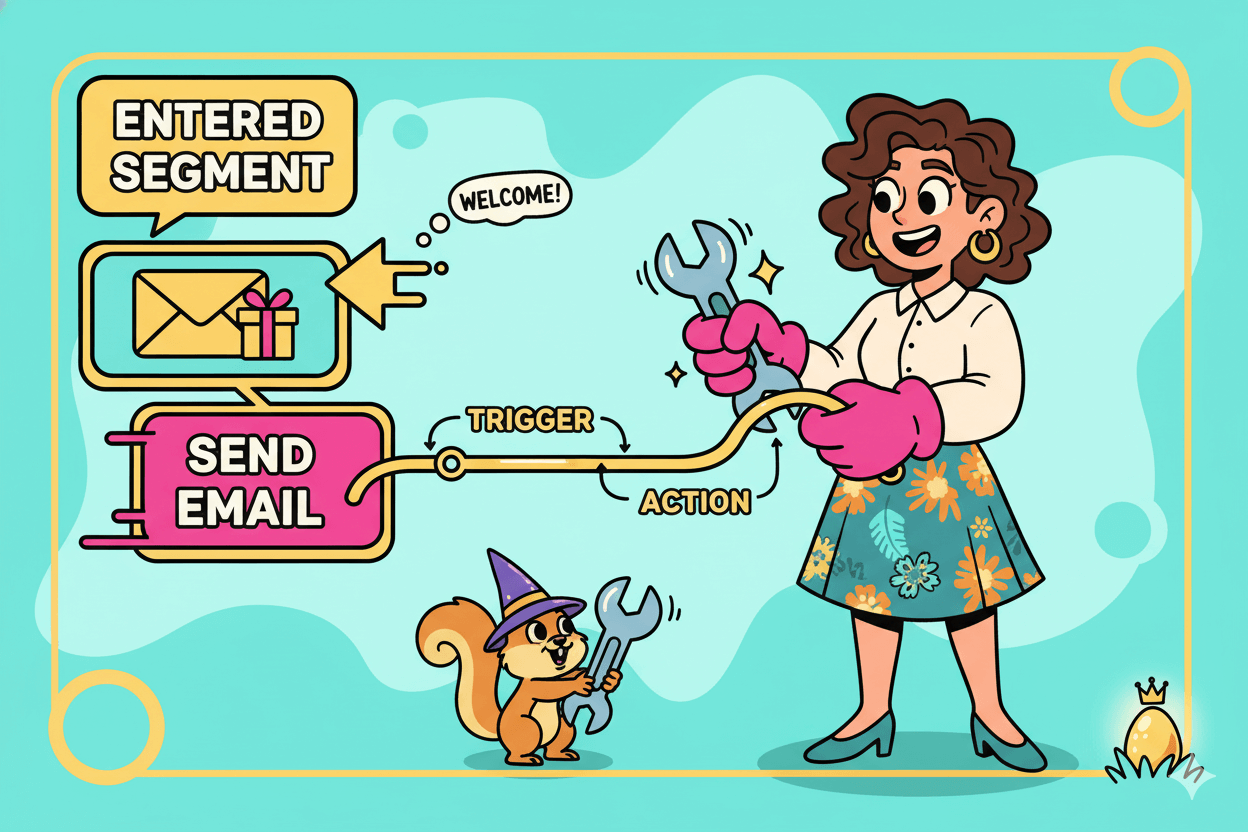
Drop Entered Segment on the Canvas and pick your pre-created Segment. Best practice is to create the Segment first, since this Trigger only fires when someone enters an existing Segment.
Connect the Trigger to an Action: Send email step that contains your download link and a short welcome. Save the draft once you see the connection line and step labels in place.
Test then Activate
Use a test contact that meets the Segment conditions to confirm the Trigger fires and the email is delivered. When you’re satisfied, click Activate Flow.
Activation makes the flow live for anyone who enters that Segment from this point forward. If you later need to adjust copy or routing, pause, update, and reactivate so changes are predictable and documented.
For onboarding sequences or expansions, repeat this pattern: decide the Segment or event that should start the journey, connect Actions and Filters, and activate once your test passes.
The same visual model scales from one delivery email to multi-step welcomes without changing tools or mental models.
Capture the Lead: Opt-In Patterns that Convert
Match the pattern to the moment: exit-intent, slide-in, or two-step.
Choose the capture pattern that fits your page and traffic.
Exit-intent is strong for saving abandoning visitors; it fires when desktop behavior suggests a close or navigation away, and mobile versions rely on proxies like back-button taps, rapid upward scrolls, or inactivity windows.
Use it when the user has scanned enough to decide and needs a clear next step.
Slide-ins work during engaged reading without blocking the main task. Trigger them on scroll depth or time-on-page so the offer feels like a helpful prompt, not an interruption.
Modern popup platforms support precise rules by device, page type, source, and frequency capping, which lets you avoid showing repeat visitors the same ask.
Two-step (multi-step) opt-ins reduce friction by asking for a small click or choice first, then presenting the email field.
The psychology is micro-commitment: once someone takes a tiny action, consistency nudges them to complete the second step.
Use this on pages where a full form would feel heavy or when you want quick preference data to personalize the follow-up. – Blend Commerce
Exit-intent vs slide-in vs two-step: when each wins
- Use exit-intent on product, pricing, or long-form pages to recover leaving users with a benefit-led offer or content upgrade. Mobile implementations should rely on behaviors like back-button use or idle time rather than cursor movement.
- Use slide-ins for mid-scroll prompts tied to article context or category. Trigger on 50–75% scroll or 30–60 seconds to align with reading patterns.
- Use two-step when asking extra questions or segmenting; the first tap builds momentum and the second step captures the email.
pro_tip: Refresh creatives quarterly. Curated galleries and playbooks surface new patterns you can adapt without starting from zero.
Map your form to an Encharge Segment trigger
Whatever tool you use for the popup or form, wire its submission to your ESP and maintain a Segment in Encharge that represents “Lead magnet opted-in.”
Your build will trigger the Flow on Entered Segment, so every successful submit drops the person straight into delivery and welcome.
Most popup tools let you target by device and cap frequency; use those controls so only net-new visitors see the offer aggressively.
Copy and creative: benefit-first hero line
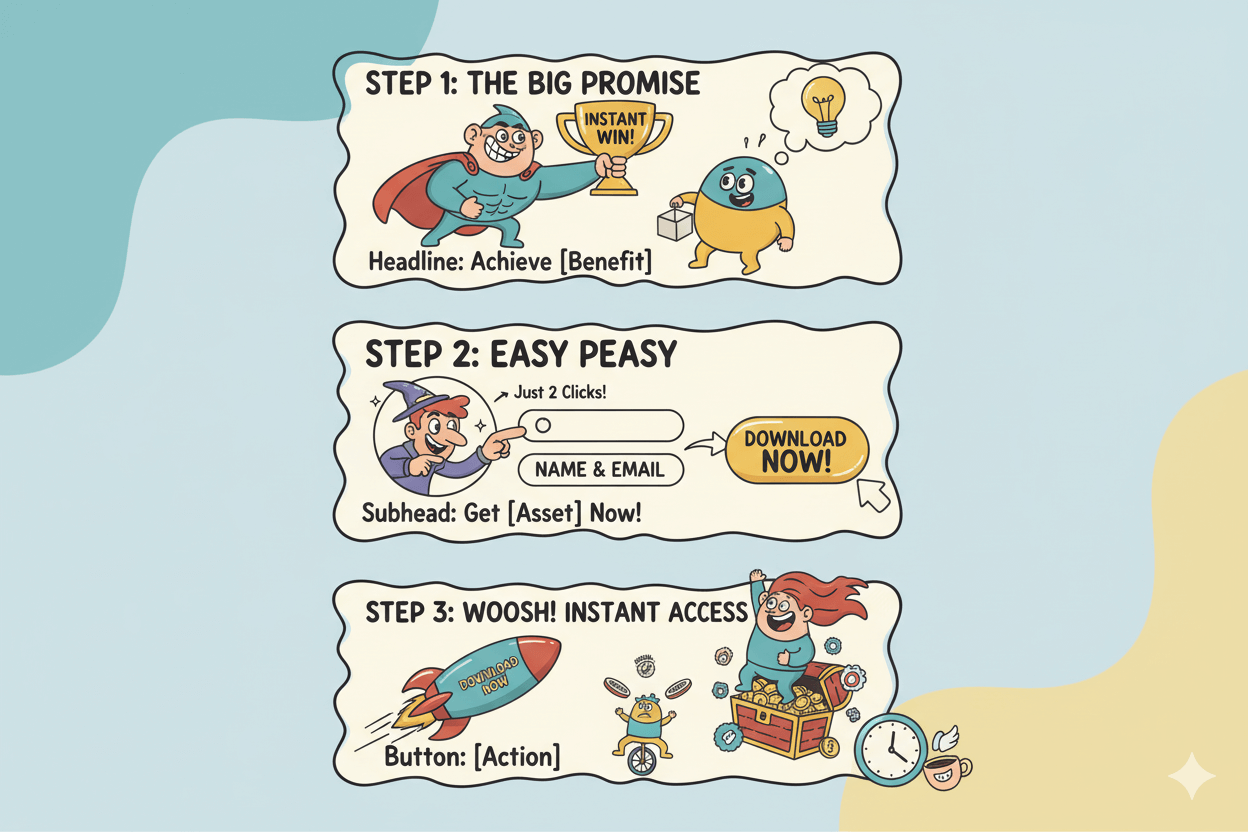
Lead with a single, specific benefit and promise fast access. Keep fields minimal, and match art to the asset or outcome.
Example structure: headline names the win, subhead clarifies the deliverable, button labels the next action. For social proof or urgency, borrow patterns from current example sets, then A/B test timing and placement.
Further inspiration: recent best-practice roundups and statistics help prioritize timing rules, device logic, and creative refresh cadence.
Deliver the Lead Magnet and Send a Warm Welcome
Fire Entered Segment → Send email for instant delivery and a one-line promise of what’s next.
Instant delivery builds trust and momentum. In your Flow, connect the Entered Segment trigger to an Action: Send email step so new subscribers receive the asset right away.
The Send Email action lets you attach an existing message or compose a new one with the drag-and-drop or simple editor, so you can keep this first touch short, friendly, and focused on access.
Include a direct download button near the top, then a one-sentence promise of what comes next.
Keep targeting clean. Because Segments in Encharge update automatically, only people who meet your “lead magnet opted-in” conditions will enter this Flow the moment their data qualifies.
That dynamic membership is why segment-based triggers are reliable for delivery and onboarding.
Draft the delivery email inside your Flow
Open the email step and add three essentials: a clear subject (“Your guide is inside”), a top-of-email button with the download link, and a short welcome that sets expectations for the next message.
If you prefer a narrative arc, Encharge’s welcome-series guidance recommends sharing the magnet immediately, then using follow-ups for story and next steps rather than crowding the first send.
do’s_and_don’ts
Do: put the link above the fold; promise what’s next in one line.
Don’t: bury the link or stack multiple CTAs in email one.
Add UTM parameters to your download link and test
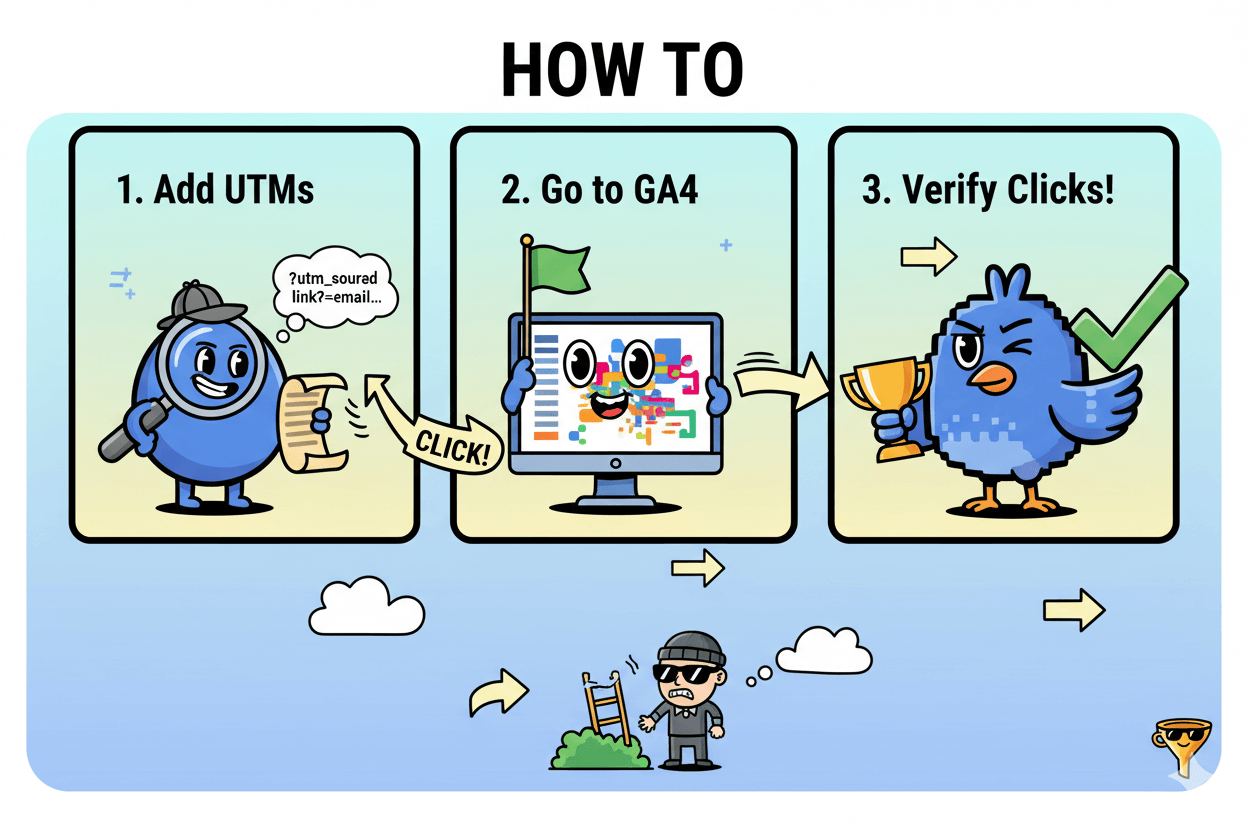
Append UTMs so you can verify clicks outside your ESP.
Use a simple pattern like ?utm_source=email&utm_medium=welcome&utm_campaign=lead_magnet. In GA4, navigate to Reports → Acquisition → Traffic acquisition to see source/medium and campaign values populated from your UTMs.
This quick check confirms real click-through independent of email tracking pixels.
Set the welcome message and next-step nudge
A friendly one-liner right after the button tells readers what to expect tomorrow: a tip, a checklist, or a short video that helps them use the asset.
Many practical playbooks frame this as “instant delivery now, value email next” so momentum stays high without overwhelming the first touch.
If you want external benchmarks to sanity-check performance, use current industry open and click rates as directional context while you optimize your own numbers.
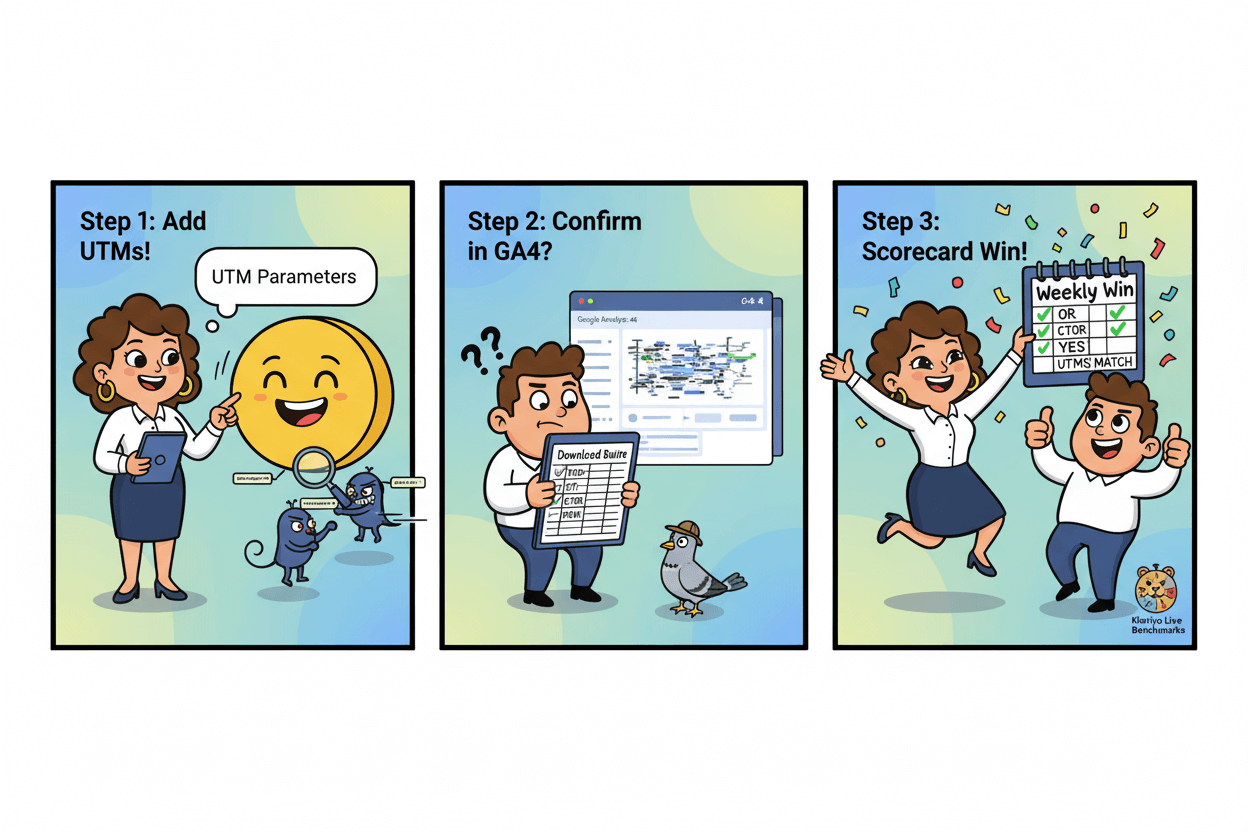
Micro-challenge: Before you activate, send the delivery email to yourself, click the button, then confirm the session appears under your campaign in GA4’s Acquisition report. If it doesn’t, fix the link and retest.
Measure What Matters: Opens, CTR, and CTOR
CTR tells reach; CTOR tells in-email relevance. Fix the right thing first.
Where to read your metrics and what they mean
Numbers remove guesswork. Start with what Encharge can show you at a glance—opens and clicks—then layer ratios that tell you what to fix first. Track both so you know whether to adjust the subject line or the body content. – MeasureSchool
CTR vs CTOR: choose the right lens
If CTR is weak and CTOR is decent, improve your subject line and preview text. If CTR is fine but CTOR lags, simplify copy, move the primary button higher, and reduce competing links.
Vendor explainers and industry primers align on these roles for CTR and CTOR.
UTM spot-check in GA4
Validate clicks outside your ESP. Add UTM parameters to your download button or link, then confirm sessions and clicks in GA4 → Reports → Acquisition → Traffic acquisition.
Google’s documentation confirms those parameters appear in the Traffic acquisition report when users click through.
When you want a directional target for improvement, use up-to-date industry ranges, then narrow the gap step by step.
Klaviyo’s live benchmarks and peer-group tools show how brands similar to yours perform, which helps set realistic goals for the next test window.
Narrow, well-targeted sends also tend to outperform broad blasts on open and click rates, so measure segments separately when you can.
pro_tip: Build a tiny scorecard you update weekly: OR, CTR, CTOR, and a single yes/no note on whether UTMs matched email clicks. Make one change per week and rerun the same scorecard so you see cause and effect.
Resend to Non-Openers the Right Way
Segment non-openers, duplicate the broadcast, change the subject, delay, send.
A careful resend stretches reach without noise. The safe pattern is simple: build a non-openers Segment, duplicate the original broadcast, change the subject, delay the send, and monitor complaints.
Encharge documents this exact three-step method, and it’s the cleanest way to isolate only the people who missed your first message.
Build the “not opened” Segment with conditions
In Encharge, go to People → Add Segment and define two Email Activity conditions: received broadcast X AND not opened.
Save it with a clear name like “Non-openers: [Campaign/Date]” so you do not mix audiences later. Encharge’s Segment builder supports these email-activity conditions and lets you refine by timeframe if needed.
Duplicate the broadcast and set the audience
Open the original broadcast, duplicate it, and set the audience to your new non-openers Segment. This avoids re-sending to people who opened or clicked and keeps analytics clean for A/B comparison.
Encharge’s help center walks through duplicate-then-target as the recommended workflow.
Subject variants, send time, and measurement
Change the subject line and preview text to offer a new angle, not just a punctuation tweak; you’re trying to re-earn attention, not brute-force it.
Add a short delay before the resend so the second message does not crowd inboxes. Many platforms suggest a minimum gap of one to two days; in any case, measure unsubscribes and spam complaints on the resend separately from the original.
Community and vendor guidance warn that aggressive resending can harm reputation, so keep frequency conservative and watch complaint rates as your stop signal.
do’s_and_don’ts
Do: segment precisely; change subject and preview; delay the send; monitor complaints.
Don’t: blast the entire list again; resend multiple times; ignore rising unsubscribes or spam reports.
Deliverability guardrails you must meet
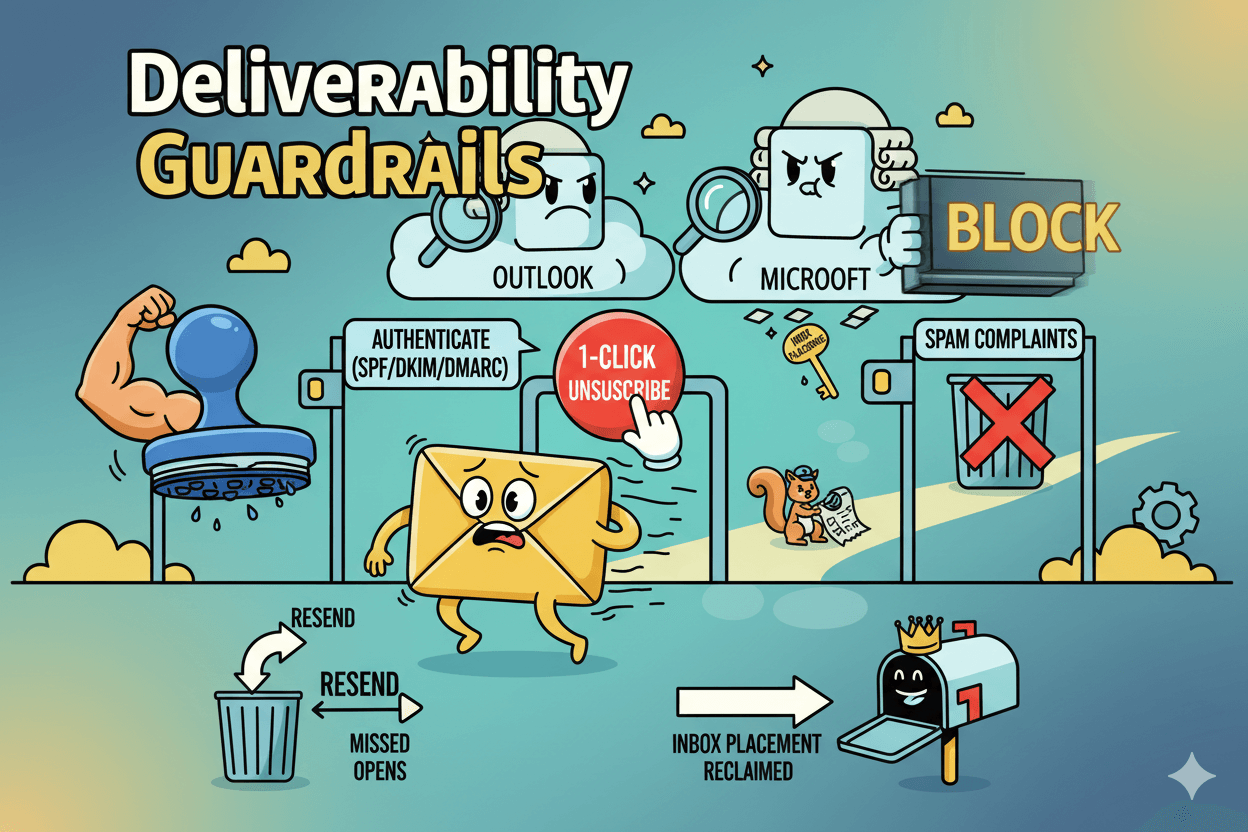
Mailbox providers tightened rules in 2024–2025.
Authenticate (SPF, DKIM, DMARC), support one-click unsubscribe, and keep spam complaints low; Outlook/Microsoft added parallel requirements and reserves the right to filter or block non-compliant senders.
A careful resend that respects these rules, plus good list hygiene, maintains inbox placement while reclaiming missed opens.
Put the System on Rails: Maintenance and Iteration
A 20-minute weekly pass: OR, CTR, CTOR, and a UTM match check in GA4.
Weekly metrics ritual
Keep it light and regular. Review OR, CTR, and CTOR, plus a quick check that your UTMs show up in analytics. Use current industry ranges as a backdrop, then let your list’s trend line be the guide.
Klaviyo’s 2025 benchmarks make it easy to sanity-check both campaigns and automated flows by industry and message type.
Small safe tests: subject, timing, popup offer
Run one change at a time so you can see cause and effect. If CTR lags, start with subject and preview text next week. If CTOR lags, tighten the email body: clearer promise, fewer links, button higher.
Re-read benchmarks only to set a direction, not a destination, because performance varies by niche and segment mix.
When to refresh capture
Exit-intent patterns evolve quickly and tool blogs keep publishing fresh, example-rich playbooks. Borrow what fits and test: timing windows, device rules, and benefit-first copy.
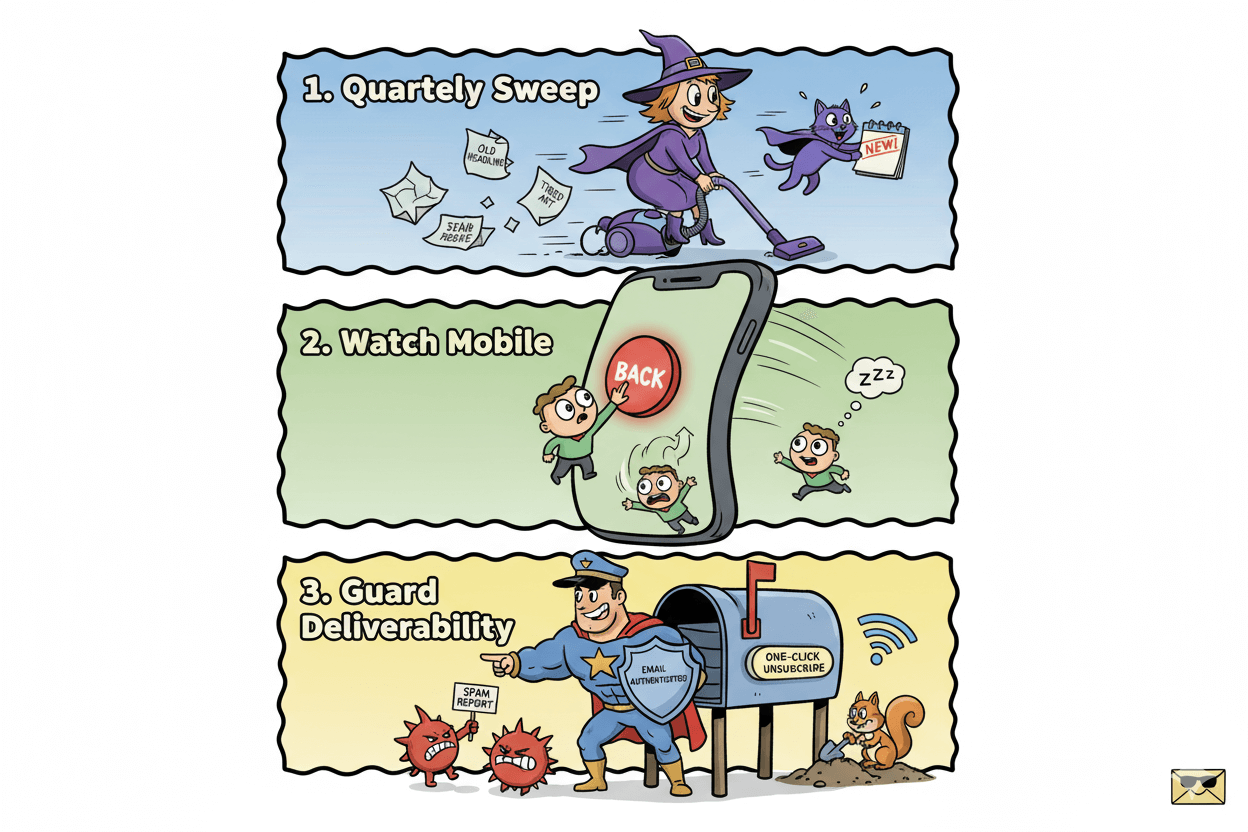
Recent galleries from OptinMonster and Wisepops show updated designs and targeting ideas you can adapt without rebuilding your stack. Schedule a quarterly sweep to rotate a new headline, artwork, or incentive.
Watch mobile specifically. Desktop exit-intent relies on cursor movement, while mobile needs other behaviors like back-button taps, rapid upward scrolls, or inactivity.
When you trial a new capture, set separate rules and reports for mobile so you see its true contribution. OptinMonster documents the mobile approach and setup flow.
Guard deliverability while you iterate. List hygiene and mailbox-provider rules are now strict: authenticate, honor one-click unsubscribes, and keep user-reported spam low.
Build a recurring hygiene task to suppress chronic non-engagers and remove bounces so complaint rates stay low. Use Gmail Postmaster Tools for complaint monitoring and follow Yahoo’s sender guidance for thresholds.
Create a simple change log: date, hypothesis, the single tweak, and the metric you’re trying to move.
Pair it with a weekly dashboard: OR, CTR, CTOR, and a yes/no that UTMs in GA4 matched your ESP’s click count. If they diverge, inspect the link, campaign tags, and redirects before testing anything else.
pro_tip
Lock a monthly “mini-retro.” Pull the last four test entries, compare deltas to Klaviyo’s ranges, and nominate one capture refresh from current example libraries for the next month’s trial. Keep the scope small so you never pause sending while you improve.
Conclusion
You now have a clear, repeatable way to turn visitors into subscribers and momentum into measurable results.
In Encharge, the moving parts are visible and named: Flows you can drag into place, Segments that auto-update as people behave, and email Actions that deliver value the moment someone qualifies.
That clarity is your advantage because it shortens setup and makes iteration obvious.
Keep the engine honest with UTMs. Add campaign tags to your download button, then verify traffic where it counts: GA4 → Reports → Acquisition → Traffic acquisition.
When ESP clicks and analytics sessions line up, you can trust the wins and fix the gaps. If they don’t, adjust links and retest before changing copy or timing.
Maintain a light weekly ritual. Read opens, clicks, CTR, and CTOR to decide whether to tune subject lines or on-page calls to action.
Treat industry numbers as a backdrop, not a grade—use current 2025 ranges to set direction, then let your list’s trend line guide the next test.
Narrow, well-targeted sends usually perform better than broad blasts, and small, steady changes compound.
When reach is lagging, run one careful resend to non-openers using Encharge’s documented method: segment, duplicate, adjust subject, delay, and measure.
Respect mailbox-provider rules while you do it. Done thoughtfully, this reclaims attention without eroding deliverability.
Ship the first version today, capture learning this week, and improve next week—the system is built to support that rhythm.

Encharge IO: Turn on the Lead Magnet Engine


