LOVO AI: Creator-Friendly Pricing
Start cheap, learn fast, and scale what works. This deal allows you to explore various formats, such as listicles, tutorials, or stories, with ease and confidence. Keep the pace that feels right and let captions guide the cuts. You’ll feel in control.
Friend to friend: a few links are affiliate links. When you purchase, I might get a tiny thank-you from the company, with zero added cost to you. I only recommend things that I’ve actually tried and looked into. Nothing here is financial advice; it is for entertainment. Read the full affiliate disclosure and privacy policy.
No studio. No mic. In about an hour, you’ll turn a script into a natural LOVO voiceover, export WAV + SRT, sync tight visuals, and publish with captions—using presets, checklists, and small tweaks that lift retention.
You’ll pick a voice, adjust pace and emphasis so your hook lands, then export WAV and SRT for fast editing and accessible uploads. Captions help viewers follow along on mobile and keep your message clear for everyone.
Short-form is growing, so you’ll also learn a micro-script rhythm that suits vertical viewing while preserving clarity. New AI creation features inside platforms keep raising the bar, which makes timing, captions, and story beats even more important.
You’ll use presets, checklists, and quick tests in analytics to improve bit by bit—small moves like speed, pause length, and emphasis add up on retention. Publish one video, save your preset, and roll it forward with confidence. – Techradar

Quick start: LOVO Genny to YouTube in one sitting
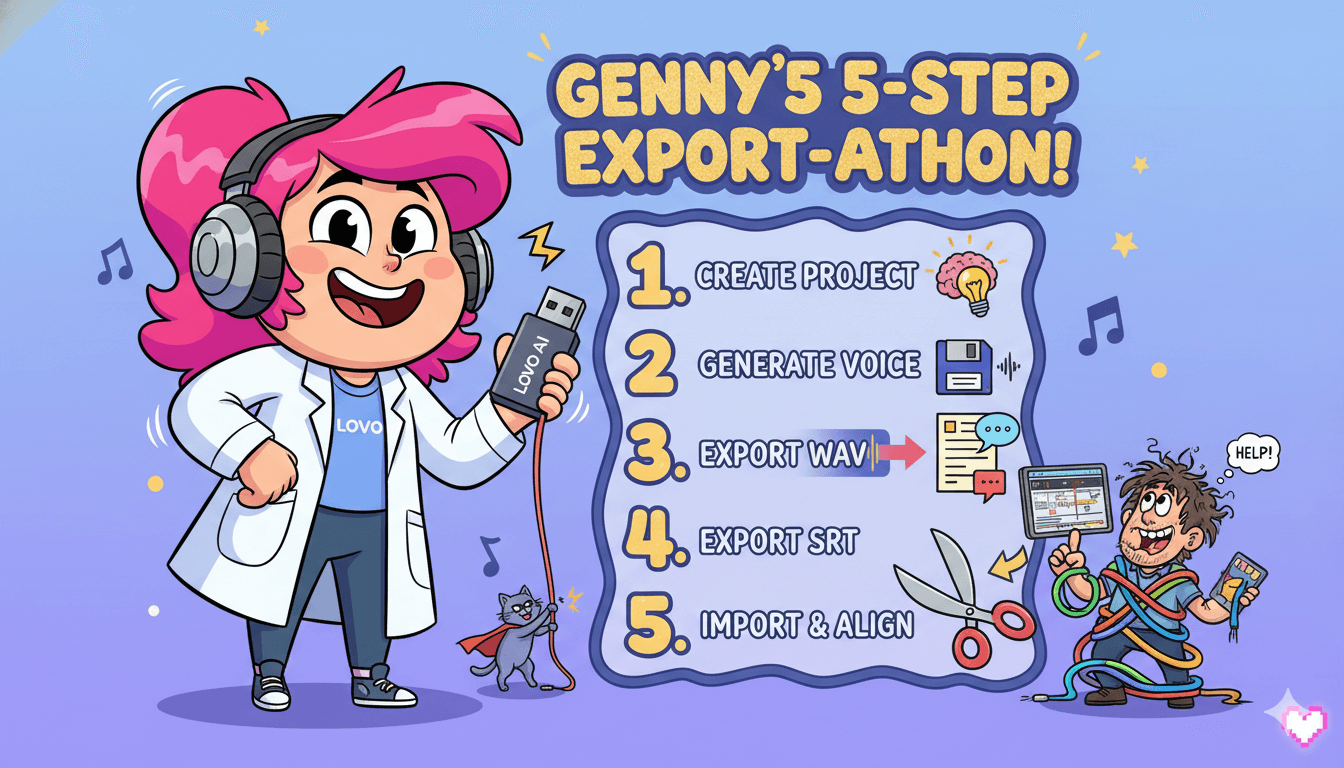
From script to publish in one hour. Keep the path tight: create a project, turn text into a natural read, export WAV + SRT, then line everything up in your editor for clean captions and cuts. Small, consistent moves beat endless tweaking.
Create and configure your first LOVO project
In Genny, start a new project and set language and sample rate. Paste your script in clean blocks: hook, payoff, CTA. Choose a voice that fits your niche, then preview the first few lines. Nudge Speed to 0.95–1.05 and apply Emphasis on hook words. Render a draft take.
Export WAV + SRT correctly
When the read feels natural, export a high-quality WAV for editing. Also export SRT to carry timestamps and visible text. Captions improve comprehension on mobile and preserve timing anchors you can snap cuts to later. Keep the SRT filename identical to the video name for smoother upload pairing.
Import to CapCut/Premiere and align on the timeline
Drop the WAV on track one. Place the SRT and confirm the first few lines match the audio. Add beat markers at hook landings and scene changes.
Trim silences that stall momentum. Lay b-roll on markers so visuals “hit” with words. Save this timeline as a reusable template for the next video. – LOVO

quick_win: Save a “Narration-Base” preset with your chosen voice, speed, and emphasis so future projects start from the same feel.
Sound human: voice style, tone, and emotion presets
Save a preset that sounds like a person. Start with a confident baseline voice, then shape pace, pitch, and emphasis so your hook lands and your story flows. Save what works as a preset… then reuse it across the series for a consistent vibe.
Then lock in a preset per show format—listicles, tutorials, or storytelling—so you never start from zero. Independent reviews agree that testing is the difference between “good” and “believable.”
Pick a baseline voice and fine-tune pace and pitch
Choose a voice that matches your niche’s energy. For education and finance, favor calm and neutral; for storytelling, choose warmer timbre.
Set Speed around 0.95–1.05 to keep articulation crisp. Avoid big jumps; tiny changes move realism more than drastic ones. If your voice offers pitch control, keep shifts subtle so tone stays grounded.
Run A/B tests on your hook line and listen on mobile speakers first.
Add emotion and word-level emphasis to land hooks
Use Emphasis on keywords that carry meaning: problem, payoff, proof. Shorten pauses before hook words to create lift. Lengthen the pause after the claim so visuals can “hit.”
If your chosen style supports emotion tags, try “friendly” for tutorials and “narrative” for stories, but keep it light so it doesn’t sound theatrical. Render 10–15 seconds, review, then commit to a take.
Build and save presets per series
Create one preset per format: “Tutorial-Calm,” “Story-Warm,” “Listicle-Crisp.” Each preset stores voice, speed, and emphasis habits so new episodes stay consistent.
Rotate only one variable per experiment—usually speed—then check retention and average view duration in YouTube Analytics to see if the change helped. Consistency builds brand memory and simplifies editing. – Zapier
Timing to visuals: b-roll sync, captions, accessibility
Let captions set the beat. Tighten the read, let visuals hit on meaning, and keep captions clean so viewers follow every beat. Your voice sets the rhythm. Your cuts and on-screen text make it visible.
Get these right and watch time climbs because nothing feels confusing or slow. The goal is simple: your viewer never wonders what to look at next.
Beat marks and silence trimming
Lay the WAV on track one and the SRT above it. Skim the timeline and set markers at hook words, scene changes, and payoffs. Trim micro-silences that break flow, but keep breath space before new ideas so visuals can change cleanly.
If a line runs long, split it into two captions and add a quick cutaway so the viewer sees motion on the emphasized word. For listicles, plan one visual hit per bullet; for stories, align shifts with cause→effect moments.
Styling captions for mobile
Use captions as both accessibility and pacing tools. Keep 2 lines max, ~32–40 characters per line, and strong contrast. Place them above safe margins so they do not collide with UI.
Capitalize proper nouns, not whole sentences. Add a tiny pause before big claims so the line appears just before the word lands. When you export, ensure the SRT timecodes reflect your trims so captions remain locked to the read on upload.
Common drift fixes after export
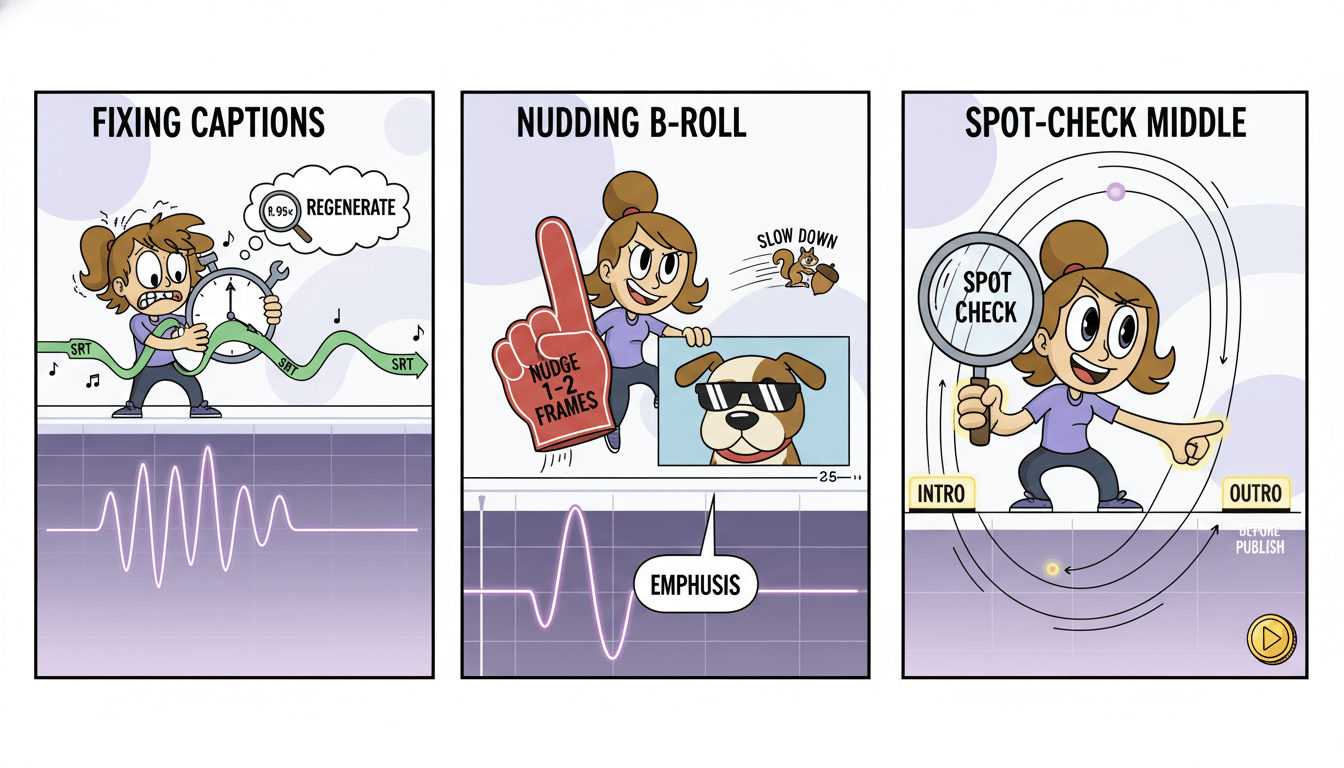
If captions misalign after editing, either regenerate the SRT from the final timeline or adjust timecodes slightly until the first and last lines align.
Should the b-roll appear to be delayed, adjust the media by moving it one or two frames earlier during the emphasized words. If the read still feels rushed, slow the section by 0.95× and re-trim silences rather than stretching captions.
Always spot-check the middle of the timeline, not just the intro and outro, before publishing.

pro_tip: Build a “Beat Marker” preset in your editor with hotkeys for add-marker, ripple-trim, and split-caption. It saves minutes on every cut.
Faceless formats and scripts that hold attention
Pick one format you can repeat weekly. Pick one you can repeat each week, then write lines that move—hook, payoff, proof, and a clean CTA.
Your voice carries the story. Your visuals make it land. Choose formats that let narration lead and let editing feel light. – FocalML
Five formats that pair well with LOVO voices
- Explainer listicles for tools, tips, or ideas. Short beats, clear benefits.
- Story snapshots that compress a case study or lesson into scenes.
- Tutorial walkthroughs with screen or b-roll while the voice guides steps.
- Comparisons and roundups where narration frames the criteria and verdict.
- Daily bite-sized facts that stack into themed playlists.
Each format keeps the voice in front and lets b-roll support meaning, not distract. [1][2]
Hook→Payoff→CTA script pattern
Write one tight sentence to hook curiosity. Follow with a concrete payoff the viewer can feel or use. Add a brief proof—a number, example, or step. Close with a soft CTA that promises the next small win. Keep sentences short.
Land key words on scene changes so viewers hear and see the idea at once. Read it out loud. Trim extra words until it flows.
B-roll and visuals that match narration energy
Pull b-roll that shows actions, not just scenery. If you say “increase watch time,” show a timeline rising. If you say “three steps,” cut to three quick shots that label the steps. Use on-screen text to echo only the critical words.
Place one visual “hit” per sentence so nothing competes with your voice. For Shorts, compress to one beat per second and center text for vertical clarity
Monetization patterns and compliant disclosures
One primary link, one plain disclosure. Treat your narration like a concierge: point to one helpful link, explain why it matters, and keep the story moving.
Your goal is simple—earn without distracting. Clean structure and short copy do the heavy lifting.
Place links and CTAs for CTR
Use one primary link above the fold in the description and repeat it near the end. Add a cards/end screen path only once your average view duration supports it.
In the script, reference the link after the payoff: “If you want the template I used, it’s in the description.” Avoid mid-video overlays that cover captions.
Pin a comment that repeats the link and a ten-word benefit. Keep the CTA calm, specific, and tied to the segment the viewer just watched.
Write clear disclosure language
Disclosures must be easy to find and understand. Put a short line before the first link: “I may earn a commission if you buy through my link.”
If you include multiple links, add “Some links are affiliate.” Keep the line in plain language and the same font size in descriptions. In video, a lower-third text card that mirrors the same wording suffices.
Do not stack legal jargon; clarity builds trust and clicks. – Pixflow
Track clicks without distraction
Use UTM tags or short links so you see which videos and formats convert best. Check click-through rate and retention together: if CTR rises but watch time falls, move the verbal CTA later and keep the description link placement.
Test one change at a time—usually the sentence that introduces the link or the first ten words of the description. Review results weekly and lock what works into your preset description.
do’s_and_don’ts:
Do: One primary link, clear disclosure, value-first CTA.
Don’t: Promise outcomes, stack pop-ups, or hide disclosures.
Shorts and platform shifts to watch
Seven lines, ten seconds, centered text. Viewers swipe in seconds, so your script, pacing, and captions must click at first glance. Treat each second like a scene. One idea, one hit, one clear word on screen.
AI tools are speeding creation… which means clarity and timing win.
Write micro-scripts for 1.1–1.2× delivery
Shorts reward snap. Draft seven lines: Hook, Payoff, Proof, Step 1, Step 2, Step 3, CTA. Aim for 6–12 words per line so your voice stays crisp at ~1.1×–1.2×.
Record 10–12 seconds, listen on phone speakers, trim filler words, and add Emphasis only on the noun or verb that carries meaning. Keep one visual “hit” per line to avoid clutter.
Caption for vertical clarity
Captions do double duty in vertical: accessibility and pacing. Keep two lines max, high contrast, and safe margins above UI. Use a thicker caption stroke than in widescreen. Echo only the crucial words from your narration.
Export SRT after trims so timecodes match the final cut; upload with the video so auto-captions do not overwrite your timing.
Split voices for long vs short
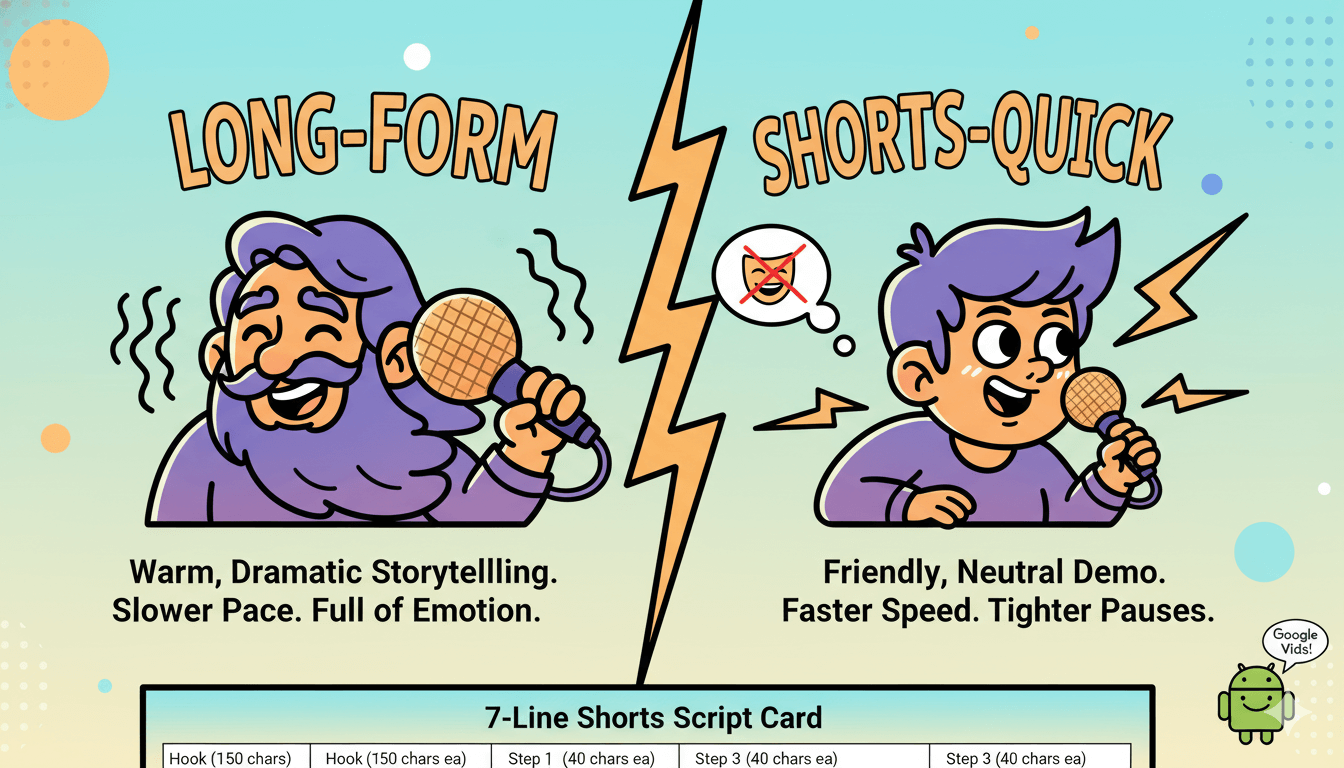
Create a “Shorts-Quick” preset with slightly higher speed and tighter pauses than your long-form preset. If your narrator supports emotion tags, prefer neutral or friendly over dramatic, which can feel theatrical at 9–20 seconds.
For tool demos, consider a lighter timbre; for stories, a warm but fast read.
Workspace teams using Google Vids can generate AI voiceovers inside the doc flow; still run the same micro-script and caption checks before publishing. – AndroidCentral

micro_challenge: Publish three Shorts this week using the seven-line pattern. Change only pause length on video two and only speed on video three. Compare 3-second and 50-percent retention to pick your baseline.
FAQs: Answering Your LOVO Ai Questions You Have In Mind
Fix it now. Publish today. Use these fixes to ship today and improve on the next upload. Keep tests small. Change one variable at a time and check retention before changing more.
Voices sound robotic → quick fixes
Start with a calmer voice, then nudge Speed in tiny steps (0.95–1.05). Add Emphasis only on words that carry meaning and shorten the pause before them so the lift feels natural.
If the read still feels stiff, try a different voice with warmer timbre, then retest the same two lines. Render 10–15 seconds, listen on phone speakers, and lock the take that sounds closest to conversation.
Save it as a preset so every episode starts from the same feel.
pro_tip: Keep sentences short. Natural phrasing comes from shorter clauses, not just settings.
Captions out of sync → quick fixes
Export WAV + SRT after your last timing edits so the file timecodes match the final audio. In your editor, place audio first, then captions, and snap the first caption line to the first spoken word.
If drift appears midway, ripple-trim silences you added after the SRT was made or regenerate the SRT from the updated timeline. Keep captions to two lines, high contrast, and safe margins so they remain readable on mobile.
Re-export the SRT once more before uploading to avoid auto-caption overrides.
myth_buster: Slowing or stretching captions does not fix audio timing. Fix the audio cut points first, then regenerate captions.
Best starter preset for your niche
Use a single baseline to get moving:
- Tutorials/education: neutral voice, Speed ~1.0, light Emphasis on verbs that signal action.
- Story formats: warm voice, Speed ~0.98, emphasis on nouns in the reveal sentence.
- Listicles/comparisons: crisp voice, Speed ~1.04, emphasis on numbers and verdict words.
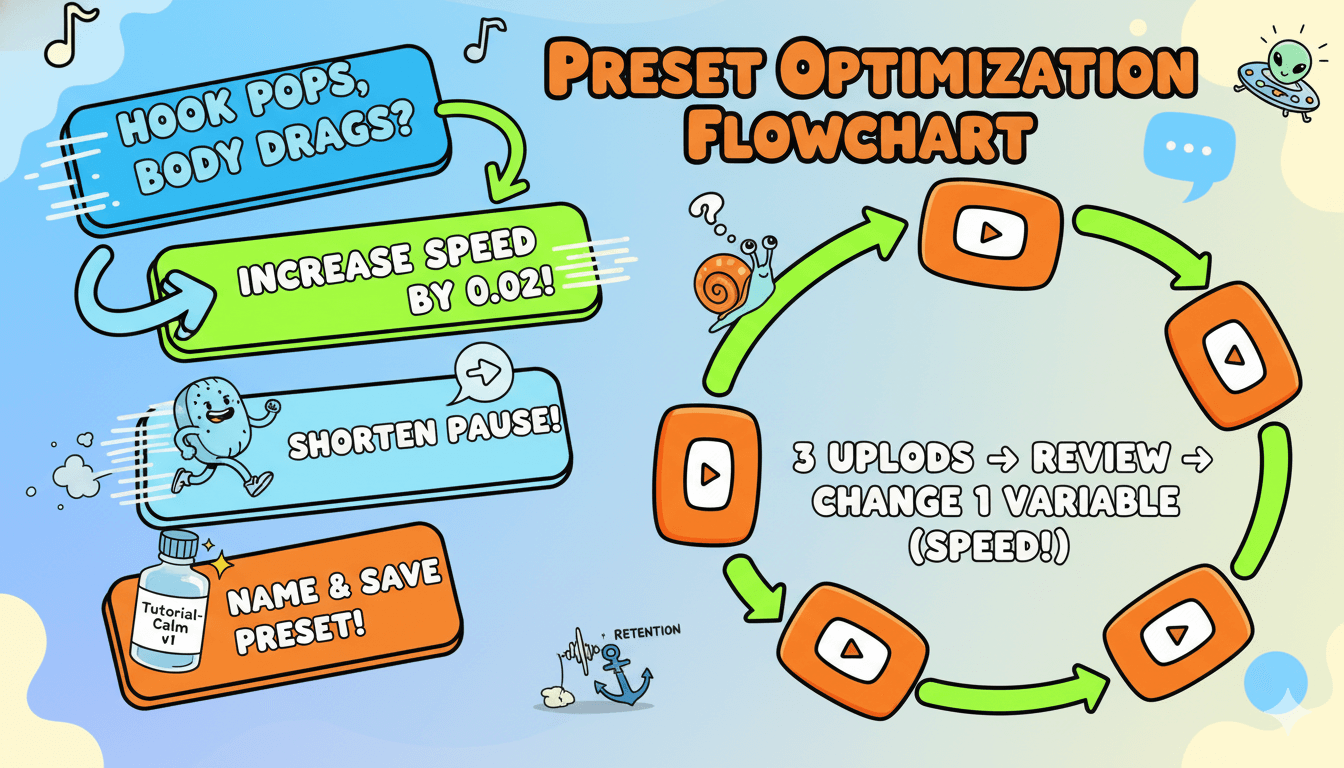
Render the hook line, then one body line. If the hook pops but the body drags, increase speed by 0.02 and shorten the pause before your key word. Name and save the preset (e.g., “Tutorial-Calm v1”). Use it for three uploads, review retention, and only then change one variable—usually speed.

Conclusion
You now have a clear system you can run on repeat. Write a simple script. In LOVO Genny, pick a voice, nudge speed and emphasis, and export WAV + SRT.
In your editor, snap cuts to caption lines, trim silences, and let b-roll “hit” where your key words land. Keep captions readable for mobile and your message stays clear.
Make this your weekly rhythm. Save a preset so every episode starts with the same sound. For Shorts, switch to your faster preset and a seven-line micro-script. Publish, then check retention and CTR together.
Adjust only one variable per week—usually pace or pause length—so you learn what actually moves results.
Monetization comes from clarity and trust. Place one primary link in the description, add a short disclosure, and reference the link after your payoff. Treat your CTA like a helpful next step, not a detour.
Re-check platform guidance before you ship.
Your next move is small and concrete. Open Genny. Load your script. Record a 15-second test, tweak speed by 0.02, add light emphasis to the hook, and export WAV + SRT.
Build your timeline template once, then reuse it. Publish one faceless video this week. Save the preset. Repeat next week with one improvement. That is how consistency compounds.

LOVO AI: AI Presets That Sound Human


